
Are you interested to know that how to add Google Tag Manager to WordPress? Do you wish to use “Google Tag Manager in cooperation with WordPress“, “add google tag manager to WordPress“, “install google tag manager WordPress“, “”? If you want to link numerous statistics and marketing services on your WordPress site, Google Tag Manager is a fantastic tool to utilize. It enables you to quickly install and manage a large number of tracking tags on your website.
No doubt WordPress websites are not only easy to handle but also contribute to boost the overall business performance, learn the few techniques than WordPress will be all yours. Google Tag Manager, on the other hand, faces a difficult task. You would need to allocate time to learn how to use the tool. We’ll also go through a basic solution that makes sophisticated tracking extremely simple to set up.
What Is Google Tag Manager?
How to add Google Tag Manager to WordPress? Google Tag Manager is a free tag management tool from Google that lets you install and edit various code snippets known as “tags” on your website.
WordPress web development is pretty simple and quick but as a results WordPress website not only grow your business health but also boot your revenue as well. You’ll need to add a few lines of JavaScript or HTML code to your website to link monitoring services like Google Analytics, Adobe Analytics, Facebook Pixel, and LinkedIn Insight with advertising solutions like Google Ads. Without having to alter your website’s code, you can easily add and update all of these tags with Google Tag Manager from a single platform. How to install google tag manager on WordPress? Let’s come to know the easy solution.
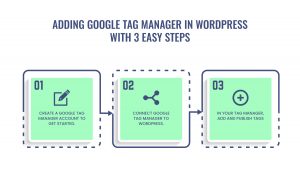
Add Google Tag Manager to WordPress Within 3 Easy Steps
Simply follow these instructions to install Google Tag Manager in WordPress.
STEP 1: Create a Google Tag Manager account to get started.
Go to the Google Tag Manager website and click Sign-Up to get started. After that, you must sign in using your Google account. You’ll be sent to the Google Tag Manager Create Account page after you’re done. To get started, select the option to “Create Account”. On the next screen, you can create a new account. Enter your account name and choose a country in the Account Setup box. Your account name might be your company’s name.
Then you must construct your container. A container is a collection of tags, triggers, and any other parameters added to a website. You may use the name of your website as the container name. Click the Create button after selecting ‘Web’ from the Where to install container drop-down box.
You must agree to the Google Tag Manager Terms of Service Agreement before proceeding. At the bottom, check the box next to ‘I agree to the Data Processing Terms as required by GDPR.’ Then, in the top right corner, click the ‘Yes’ button. When you accept the terms of service, a new popup window with code snippets for installing Google Tag Manager on your website will appear on your screen. There are two code snippets to place in the header (inside the head element) and body sections of your page.
Step 2: Connect Google Tag Manager to WordPress.
Install the Insert Header and Footers plugin after logging into your WordPress dashboard. After activation, go to the Settings » Insert Headers and Footers page. You may now insert header and footer codes in two different areas. Paste the code into the first box in Google Tag Manager. Copy and paste the code into the Header’s Scripts box.
Copy and paste the other code from your Tag Manager account into the Scripts in the Footer box. Before the ending <body> tag, the section will output scripts. While it is not exactly after the opening body tag (as Google suggests), as long as the sample is contained within the <body>…<body> tag, it is OK. After that, don’t forget to save your changes. That concludes our discussion. On your WordPress site, Google Tag Manager has been successfully deployed. You may now deploy any tracking code to your WordPress website using your Google Tag Manager dashboard.
Step 3: In Your Tag Manager, Add and Publish Tags
You’ll be able to add code snippets (tags) from other tracking technologies to your site once you’ve installed Google Tag Manager on your site. About 50 distinct tag types are supported by Google Tag Manager, including those used by Google marketing tools and third-party services. Its interface may also be used to add custom HTML or JavaScript tags to your site.
Click the ‘New Tag’ icon and follow the instructions to create your first tag. You may now add various tags to your Google Tag Manager container by repeating the method and connecting your WordPress site to other marketing and monitoring services.
How to Install GTM on WordPress Using Plugins
You may also use a plugin to install GTM on your WordPress website. However, you may still need to make some modifications to the code in your WordPress template files. The benefit of using a plugin is that you may benefit from the additional functionality offered by the plugin. I found two plugins that are beneficial for GTM code implementation. ‘Head Footer and Post Injection’ is one, while the other one is Thomas Geiger’s DuracellTomi’s Google Tag Manager for WordPress.
-
Head Footer and Post Injection Plugin
This is a fantastic plugin for adding extra code to WordPress websites, especially if you don’t know where your <head> and <body> tags are in the theme. With this plugin, you can simply copy your code and paste it into the header, footer, and body. Some of the injection sites and characteristics are as follows:
- on the page area where most of the scripts are generally inserted
- right after the tag, as certain JavaScript SDKs demand (like Facebook).
- detect and execute PHP code in the page footer (just before the tag) to add logic to your injections
- separate injections for desktop and mobile.
Follow the steps below to add google tag manager to WordPress using Head Footer and Post Injection:
- Go to your WordPress website’s dashboard and select ‘Add New’ from the plugins menu.
- Type “post-injection” into the search box.
- Look for the headings ‘Head, Footer, and Post Injection.’ Select ‘Install Now’ from the drop-down menu.
- Now go to the dashboard menu and choose “Installed plugins.”
- In the dashboard, you should see the plugin displayed. Select ‘Activate’ from the drop-down menu.
- Go to your WordPress website dashboard and click on ‘Settings.’
- Select ‘header and footer’ from the drop-down menu.
- To examine the GTM installation code, go to your Google Tag Manager account and click on the container ID:
- Copy the first portion of the GTM installation code: This may be done by clicking the ‘Copy’ symbol, as seen below.
- Copy and paste the following code into the “HEAD> PAGE SECTION INJECTION” box:
- Now copy the GTM installation code’s second part:
- Copy and paste the code into the “AFTER THE BODY> TAG” box as shown below.
- Select ‘Save’.
Congratulations! Using the Head, Footer, and Post injection plugin, you’ve successfully injected Google Tag Manager code to your WordPress website.
-
Google Tag Manager for WordPress By Thomas Geiger
Duracell Thomas Geiger’s Tomi’s Google Tag Manager for WordPress is a popular plugin for integrating Google Tag Manager into WordPress websites. It now has approximately 4007000 active installations.
The following are some of the benefits of implementing the plugin:
- If you’re using a genesis child theme, you can install GTM without making any modifications to your template file (s). To install GTM on your website, just enter your container ID and select ‘custom’ next to ‘container code placement’: However, after installation, you should check to see if this plugin is compatible with your website’s theme.
If the plugin is incompatible with your website theme, you may either uninstall it or request that the theme developer make the plugin compatible with your website theme.
- Simply push a large amount of information (related to a blog post, site search, visitors, browser, and so on) into the data layer and then transmit this information to Google Analytics using data layer variables.
- You have the option of enabling scroll tracking and/or video track.
- Specify certain tags and variables to block.
- If you’re using WooCommerce, you may enable eCommerce tracking or advanced eCommerce tracking on your WordPress website.